Smoke Tests and Projects
Creating a Smoke Test Project#
When running a Smoke Test in R3E for your selected applications a Projects is created which allows you to revisit and customise your tests as many times as required.
To create a smoke test project:
- Click Packages>Manage.
The Application Packages page opens:
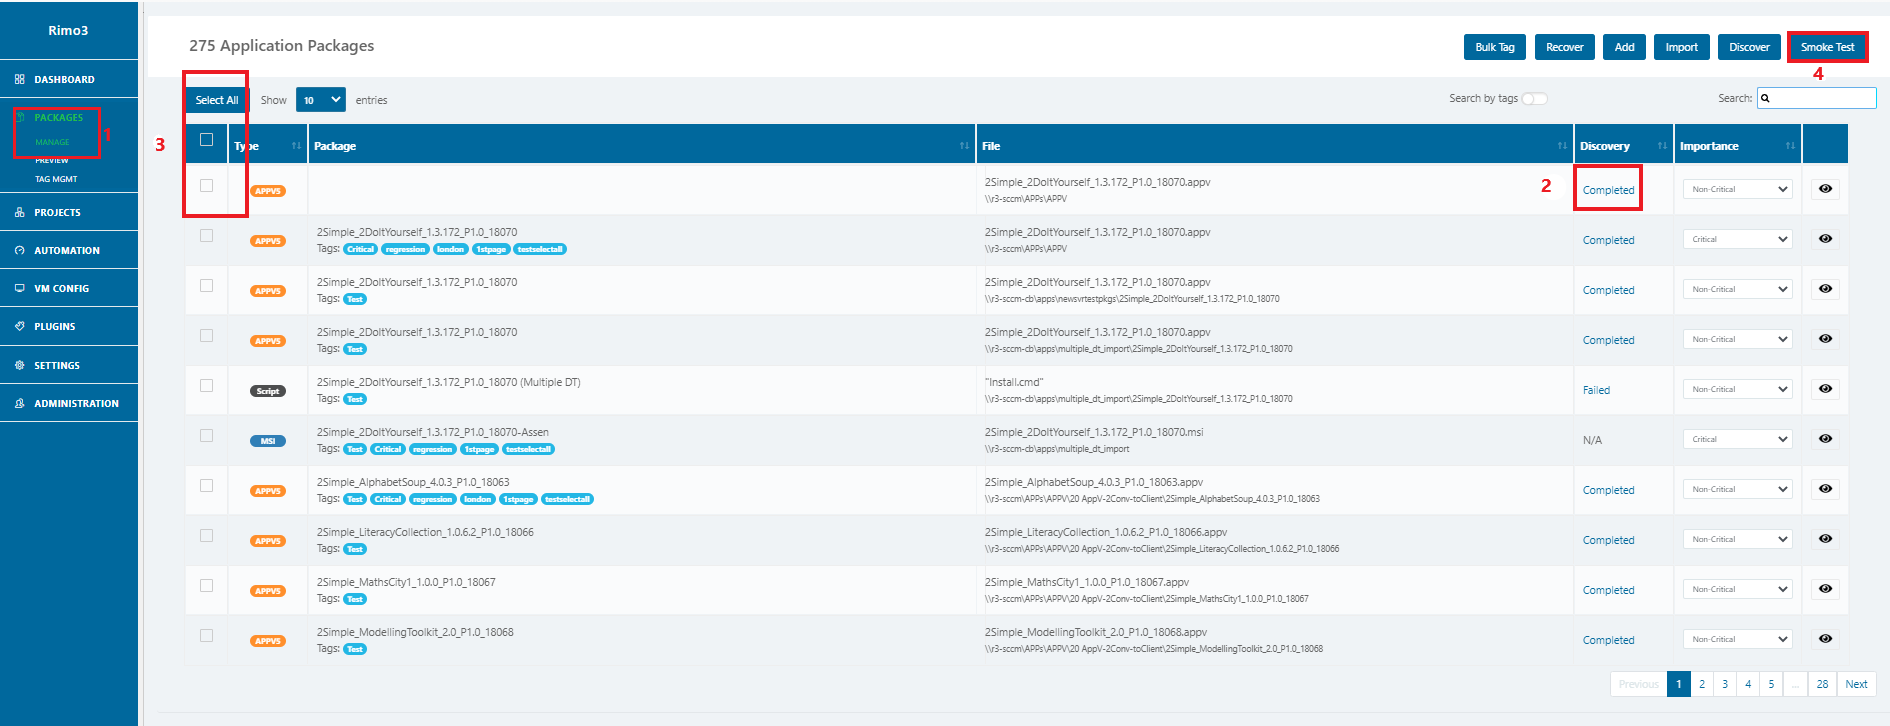
The screen displays a list of applications along with information about them.
IMPORTANT: Be sure each package you select has a value of Completed in its Discovery column.
Select one or more packages for smoke testing by clicking the checkbox at the left of their row(s) or Select All
Click Smoke Test.
The Create Rimo3 Enterprise Project wizard opens.
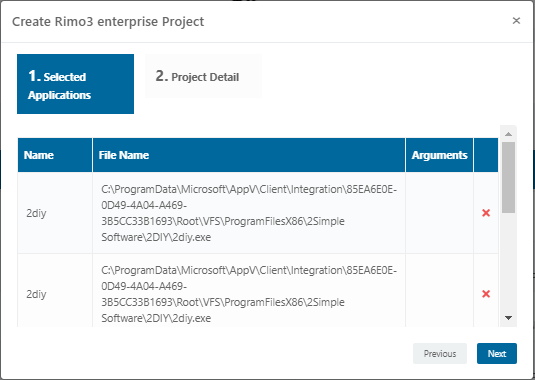
All executables from the selected package(s) are listed; you may remove an item from the project by selecting its red x. This does not remove the executable from the package, it only excludes it from the project being created.
Click Next.
The wizard opens to step
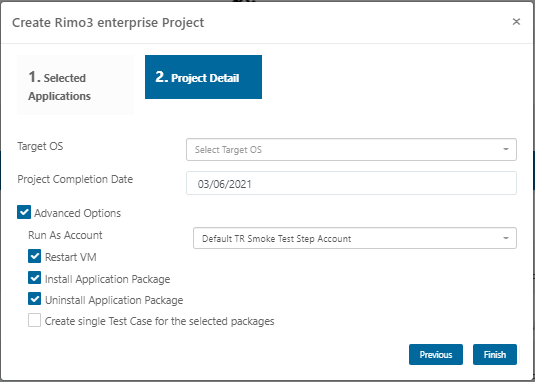
Choose the Target OS you want to test against.
note
By default, the test involves resetting the Task Runner, installing the package, and testing all selected executables before uninstalling the package. To modify any of these options, click Advanced Options. The smoke test will be run no matter which options you choose.
The Advanced Options are displayed
Make any desired changes. A different account may be selected from the Run As Account list.
note
Any changes made to the advanced options here will be applied to all test cases in the project. Test cases can be individually modified if necessary once the project has been created.
(See 'Windows Security Patch Testing')
Click Finish.
Click OK.
The project opens immediately in the Edit and Run Project window.
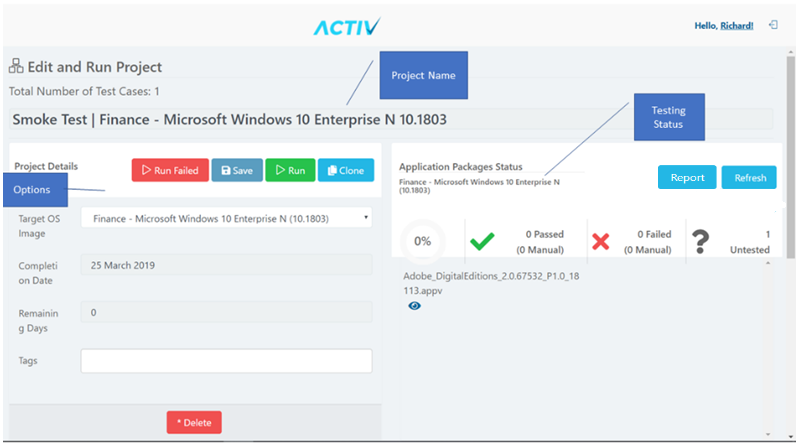
You have finished defining the smoke test. You are now ready to run it.
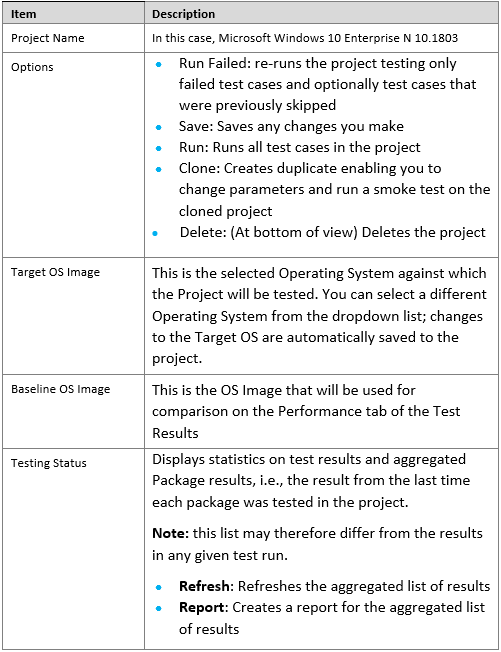
The annotated window and the table that follows describe the view's information and options:
Once you've created your project you can return to it at any time and customise it as required using the steps below.
To run your smoke test:
Once you are in the project screen then you can Run your smoke test project immediately or customise it by changing the test steps or even adding new test steps to your test sequence.
If required, choose a different Target OS Image from the list.
Click Run.
The Start a New Session window opens.
Note: When there are many test cases, starting the sequence may take some time.
If needed, choose a different Gateway from the list.
If required then choose a different Task Runner from the list.
Click Start.
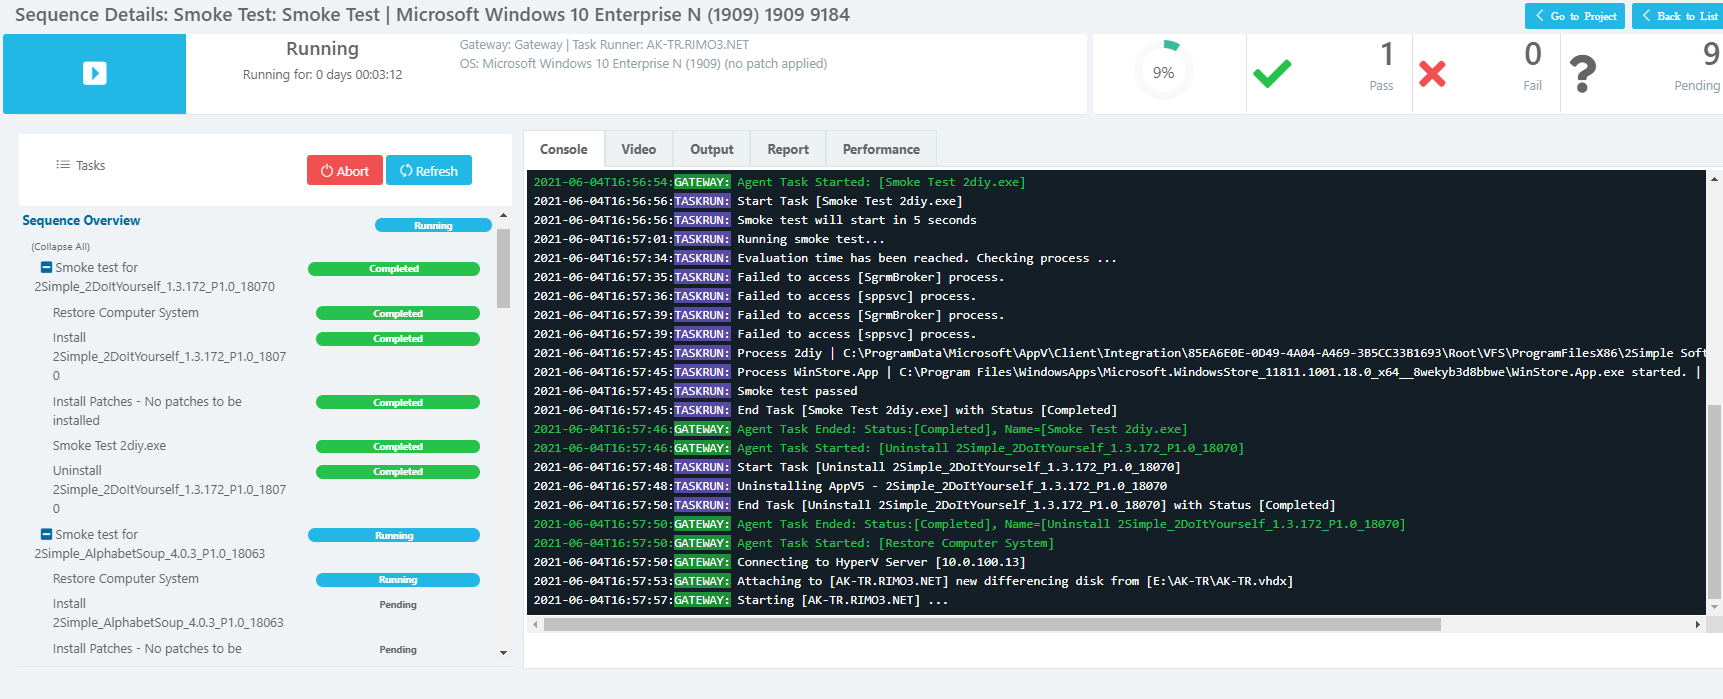
While the test is running, you can follow its progress in the task list or via the Console or Video tabs.
- To see details of the Smoke Test click the test case name in the task list and then on any Test Step to just see output for that activity. You can click on the Console Tab to see text of each part of the proces as well as the Video tab to see what is on the screen of the Task Runner during a particular section of the test.
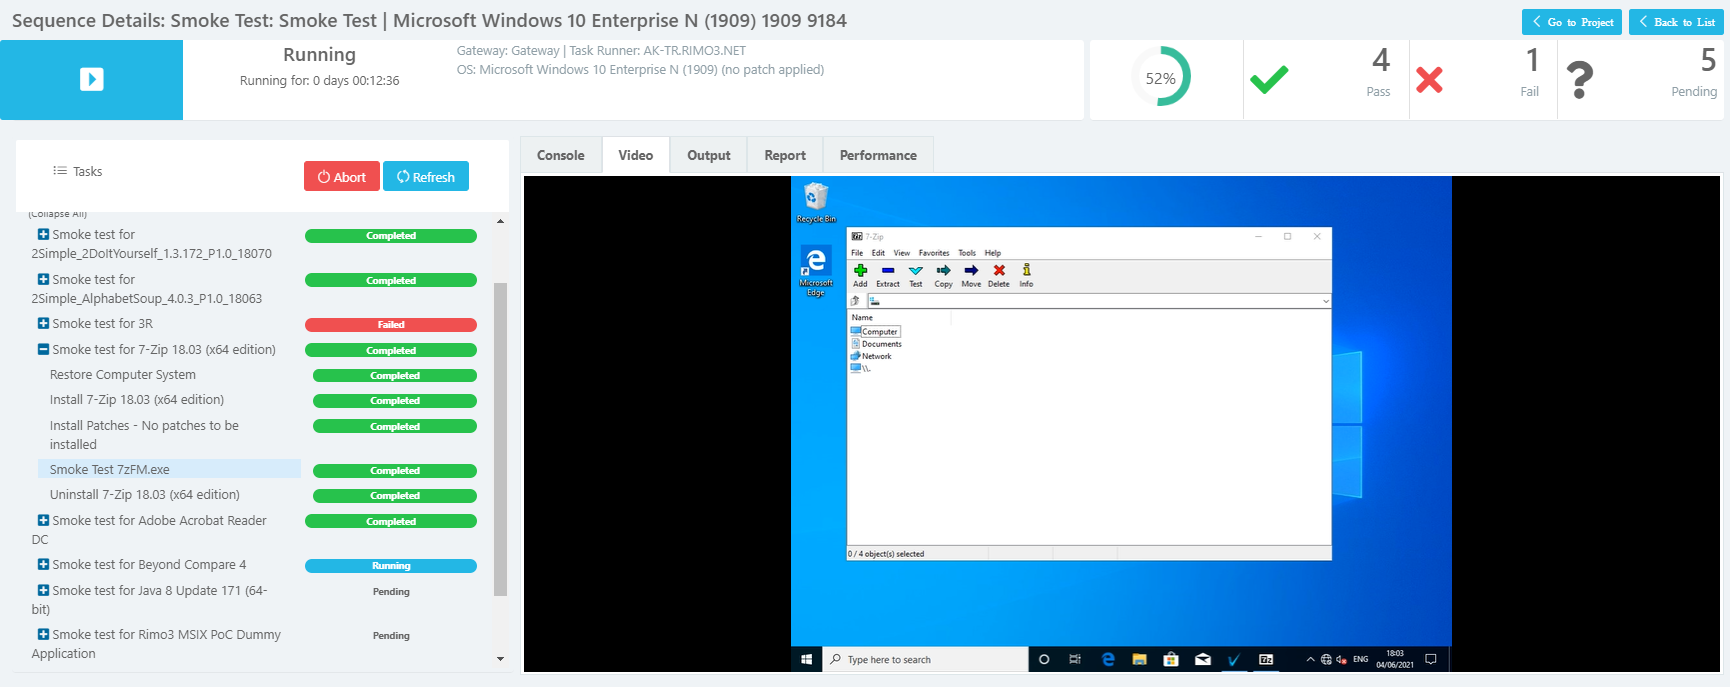
- When each smoke test step is complete, R3E immediately indicates its success or failure. Once all test steps are completed, the Test Case is marked as Failed, if any one test step has failed, or Complete if no test steps have failed.
Likewise, if any one Test Case fails, the Test Run is marked as Failed. This means that the group of applications in the project are not yet ready for the new Operating System. You can use the results of each failed Test Case to troubleshoot the cause of failure and repeatedly retest all or individual failures after remediating the failed packages or the target build itself.
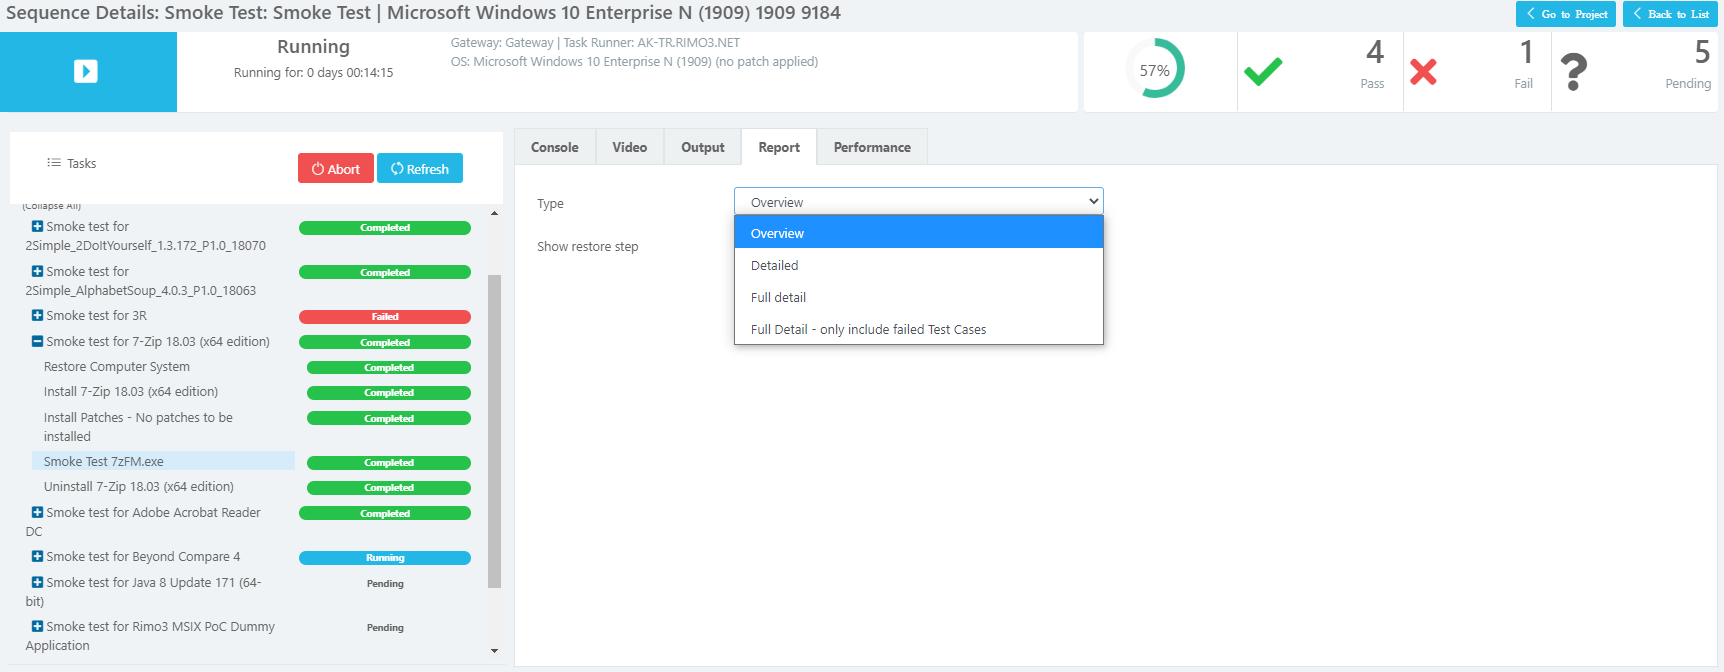
- You can click on the Report tab which will give you various options for opening a complete pdf report of the results for the whole test sequence.
- You can also click on the Performance tab which will give you data in graph format on the CPU, Memory, Hard Disk, GPU (if relevant) and the Network traffic of each application on install and when running the Smoke Test.
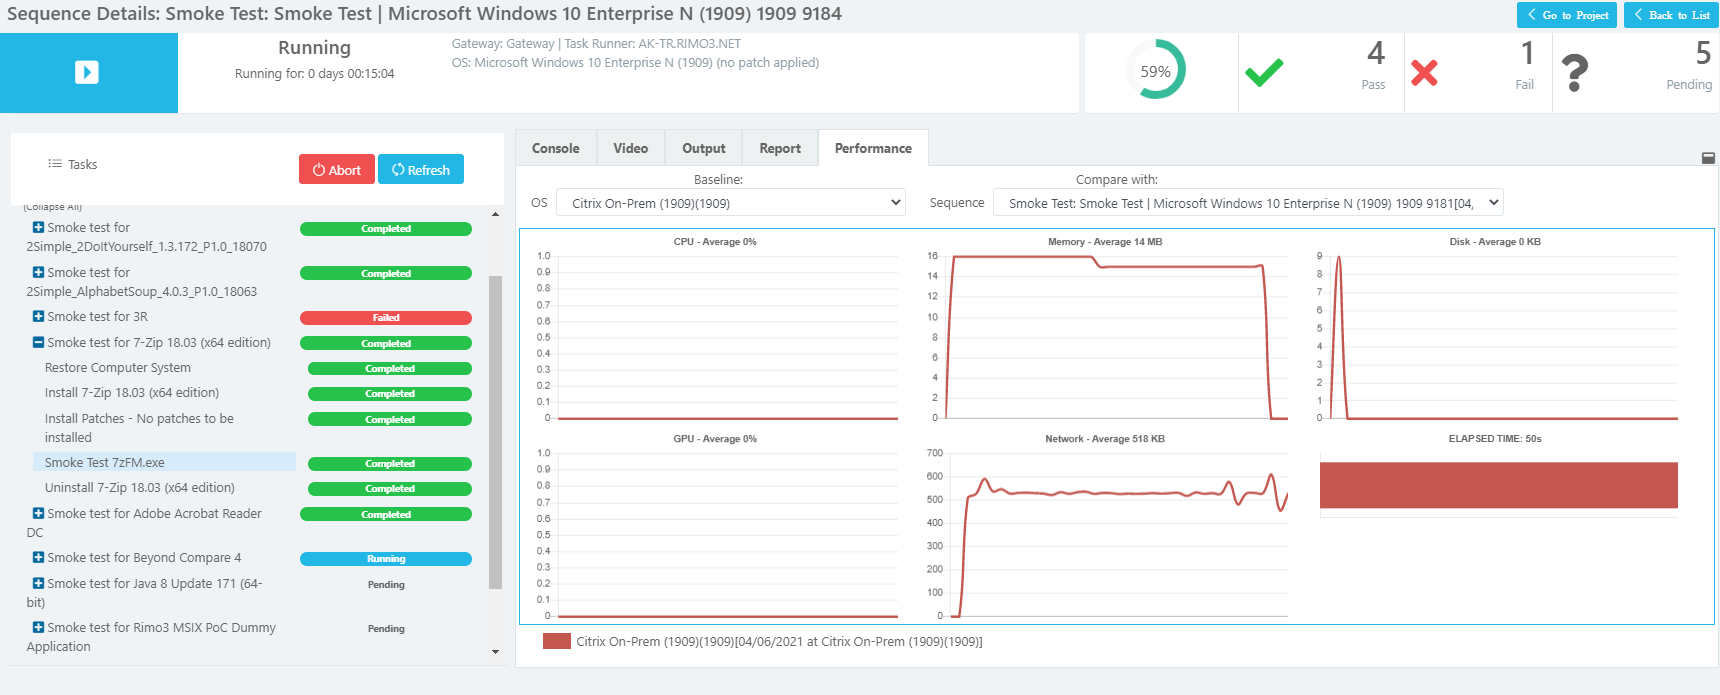
This performance data can be compared to other test you may have performed on different Task Runners.
